
The Bottom Navigation View makes it easy for users to explore and switch between top-level views with a single tap. There should be a minimum of 3 top-level views and a maximum of 5. If Destinations are more than 5 then use the Navigation Drawer. When the user taps on the icon it will change the top-level view accordingly.
So lets create a project and start configure Bottom Navigation View in android project using Kotlin.

Step 01: Modify Activity_Main.xml
It requires minimum a FrameLayout and BottomNavigationView activity_main.xml.
Sample code as below.
<?xml version="1.0" encoding="utf-8" >
<RelativeLayout
    xmlns:android="http://schemas.android.com/apk/res/android"
    xmlns:app="http://schemas.android.com/apk/res-auto"
    xmlns:tools="http://schemas.android.com/tools"
    android:layout_width="match_parent"
    android:layout_height="match_parent"
    tools:context=".MainActivity" >

  <FrameLayout
        android:id="@+id/frameLyt"
        android:layout_width="match_parent"
        android:layout_height="match_parent"
        android:layout_above="@id/bottomNavigationView"/gt;
   <com.google.android.material.bottomnavigation.BottomNavigationView
        android:id="@+id/bottomNavigationView"
        android:layout_width="match_parent"
        android:layout_alignParentBottom="true"
        android:layout_height="wrap_content"
        app:menu="@menu/bottom_nav_menu"/ >

</RelativeLayout >
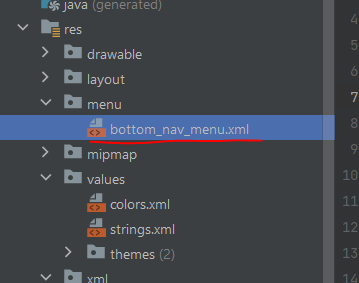
Step 02: Create Menu
Lets create a menu directory under the src directory, then create a menu.xml as per our bottom navigation view demand.
A sample code provided below.
<?xml version="1.0" encoding="utf-8"?>
<menu xmlns:android="http://schemas.android.com/apk/res/android">
    <item
        android:id="@+id/homeFragment"
        android:layout_width="wrap_content"
        android:layout_height="wrap_content"
        android:icon="@drawable/ic_home"
        android:title="@string/home" />
    <item
        android:id="@+id/categoryFragment"
        android:layout_width="wrap_content"
        android:layout_height="wrap_content"
        android:icon="@drawable/baseline_category_24"
        android:title="@string/categories" />
<item
android:id="@+id/categorySettings"
android:layout_width="wrap_content"
android:layout_height="wrap_content"
android:icon="@drawable/baseline_settings"
android:title="@string/settings" />
</menu>
Step 03: Create Fragments
When we click each bottom navigation views, we need to call appropriate fragment in our projects. So that create fragments as many as the menu we create on the above step.
One sample code for home fragment as below
home_fragment.xml
<?xml version="1.0" encoding="utf-8"?>
<FrameLayout xmlns:android="http://schemas.android.com/apk/res/android"
    xmlns:tools="http://schemas.android.com/tools"
    android:layout_width="match_parent"
    android:layout_height="match_parent"
    tools:context=".HomeFragment">


  <TextView
        android:layout_width="match_parent"
        android:layout_height="match_parent"
        android:gravity="center"
        android:text="@string/home" />

</FrameLayout>
FragmentHome.kt
import android.os.Bundle
import android.view.LayoutInflater
import android.view.View
import android.view.ViewGroup
import android.widget.Button
import androidx.fragment.app.Fragment


class HomeFragment : Fragment() {

    private lateinit var btnPlayNow: Button
    override fun onCreateView(
        inflater: LayoutInflater, container: ViewGroup?,
        savedInstanceState: Bundle?
    ): View? {
        // Inflate the layout for this fragment
        val view =  inflater.inflate(R.layout.fragment_home, container, false)

        return  view
    }


}
Step 04 : Code ( MainActivity.kt )
Modify the code MainActivity.kt as per our Bottom navigation view requires to be modified.
import androidx.appcompat.app.AppCompatActivity
import android.os.Bundle
import androidx.fragment.app.Fragment

class MainActivity : AppCompatActivity() {
    private lateinit var binding : ActivityMainBinding
    override fun onCreate(savedInstanceState: Bundle?) {
        super.onCreate(savedInstanceState)
        binding = ActivityMainBinding.inflate(layoutInflater)
        setContentView(binding.root)
        replaceFragment(HomeFragment())

        binding.bottomNavigationView.setOnItemSelectedListener {
            when(it.itemId){
                R.id.homeFragment -> replaceFragment(HomeFragment())
                R.id.categoryFragment -> replaceFragment(CategoryFragment())
                R.id.settingsFragment -> replaceFragment(SettingsFragment())
                else ->{
                    replaceFragment(HomeFragment())
                }

            }
            true
        }


    }

    private fun replaceFragment(fragment: Fragment){

        val fragmentManager = supportFragmentManager
        val fragmentTransaction = fragmentManager.beginTransaction()
        fragmentTransaction.replace(R.id.frameLyt,fragment)
        fragmentTransaction.commit()

    }
}
Step 05: Run the project
it is the time to run the project and see how bottom navigation view is working.